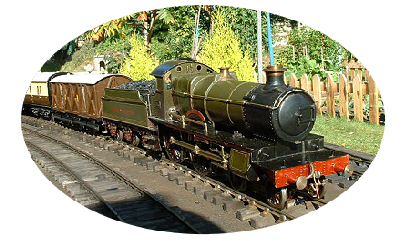
G3 Made Simple
Locomotive Project No. 1
A Live Steam 0-4-4 Tank
A step-by-step construction guide provided
by our contributor "Ginger".
Part 11 : Running on Air
This episode marks a major milestone, achieving an air tested chassis, all based upon the well proven design from the Gauge 1 Project Booklet which builders are advised to read.
Progress update
However before providing the details, a summary of the time and costs of the project up to this stage are provided below. Total time is 53 hours at a cost of £140. Cylinder £65, wheels at £60 and materials £15.
Components for the frames, horns and buffer beams - 8 hours
Assembly of the horns and frames - 6 hrs 30 mins
Wheels - 8 hours
Axle boxes and axles - 7 hrs 45 mins
Bogie construction - 7 hours
Bogie stretcher and crank axle - 4 hrs 45 mins
Connecting rod and valve gear - 9 hrs 15 mins
Cylinder installation and timing - 2 hours
Big end bearing.
The connecting rod actually consists of two parts - the big end bearing and the connecting rod itself. The bearing is made from gun metal which will ensure a long life for this very important item. The approach used is fiddly but ensures a well made accurate bearing and connecting rod. First of all we need to fabricate an accurate slab of metal which will be split down the middle and joined with 8BA screws. Cut out a slab of gun metal sufficient to achieve a finished size of 16 mm by 18mm and at least 8 mm thick. Draw file one long face to provide a reference surface and mount in the milling machine using a mill to arrive at a parallel surface to the reference face, and also mill to the finished thickness of ¼ inch.
Carefully mark out the position of the 8BA retaining screws which are positioned either side of the ¼ inch crank pin bearing hole. Drill through with a 1/16 drill. Blue one side of the block and carefully split it down the middle with a hacksaw and mill both cut faces smooth, touching up with a fine file if required. Holding both parts together in the correct alignment, insert a 1/16 drill into one side and using a small G clamp attach to a short length of ¼ square steel bar. The steel bar will eventually form the mounting face of the connecting rod. Drill right through into the steel bar using the second hole already drilled in the bearing block. Tap right with 8BA through the bronze block and the steel. Reassemble ensuring that the mating surfaces in the middle are smooth. Holding everything tight with a G clamp, drill the second hole and tap 8BA. Open out the holes in the bronze parts only to just clearance for 8 BA. You now have both parts of the bearing block and the steel bar in alignment.
Mount the assembled bronze parts and the steel bar in the four jaw using protective bits of ¼ inch brass angle and carefully align in the jaws until the bearing face is square on to the tailstock. Drill through in the centre of the block the hole for the big end pin, ensuring that the point of the drill is exactly on the split line between the two halve. Use a slowish speed otherwise the whole shooting match might come adrift from the chuck jaws, and ream out to ¼ inch.
Carefully further ream the hole with a hand reamer if necessary to ensure that the bronze bearing rotates smoothly around the big end pin in the crank axle. It may be necessary to counter sink one side of the bearing hole if there is too much solder on the big end bearing in the crank axle. Careful use of fine files will remedy this. This finishes the bearing block. Time taken was 2 hours.
Connecting rod.
The connecting rod arm part itself (not the bearing block) is based on the G1 AMRIG design and is an alternative to the plate method used for the G1 Project which uses a length of 1/8 inch thick steel plate. Drill a hole in the centre of the ¼ inch steel bar for the connecting rod which is made from steel rod. Cut off a suitable length of 3/16 inch diameter steel rod, say 3 inches, and turn the end to be a tight fit in the steel bar. Solder the turned end of the rod into the ¼ inch steel bar making a T shape.
The connecting rod arm part itself (not the bearing block) is based on the G1 AMRIG design and is an alternative to the plate method used for the G1 Project which uses a length of 1/8 inch thick steel plate. Drill a hole in the centre of the ¼ inch steel bar for the connecting rod which is made from steel rod. Cut off a suitable length of 3/16 inch diameter steel rod, say 3 inches, and turn the end to be a tight fit in the steel bar. Solder the turned end of the rod into the ¼ inch steel bar making a T shape.


The connecting rod assembly cannot be finished until the cylinder is positioned in the frames. When the length of the connecting rod has been decided turn a length of rod 3/16 diameter to fit the other end of the con rod bar and cut off with a saw. File a flat on each side of the other end to form the male part of the connecting rod that will fit inside the slot cut into the cross head. Put the male part on one side. Time taken was 1 hour.
Cross head guide
The crosshead guide normally supplied by Keith Cousins is the bar type, however you may instead choose to use the Gauge 1 brass tube type which was selected for this model. Cut off a suitable length of brass tube and trim one end square in the 3 jaw chuck. Very carefully using a boring tool, cut of just enough material from the inside face such that the tube is a tight sliding fit on the boss on the rear cylinder cover.
Cross head
The cross head that will fit inside the brass tube is made from easy turning steel rod. Turn a chunk at least ¾ inch long such that it is an easy sliding fir inside the above mentioned brass cross head guide tube. Drill and begin the tapping of one end 5BAwhilst the body is still in the lathe to ensure centrality. Cut off the cross head and turn the cut end smooth in the lathe to the final length. Carefully file a small flat on one side of the cross head away from the tapped end and then drill a 1/8 inch hole right through for the gudgeon pin. Saw a slot in the opposite end to the tapped end, using a hack saw and open out with a file to1/8 inch wide and ¼ inch deep. Finish tapping the 5 BA end and clean up. Time taken - 45 minutes.
Eccentric
The valve eccentric is made from easy turning steel rod, diameter 7/8 inch. First turn the end of the rod smooth in the 3 jaw chuck and using a centre drill make a small pin point in the centre. Remove from the lathe and mark the distance of the axle hole from the centre which is 1/8 inch . Place the rod in the 4 jaw and after getting it to spin centrally, drill the axle hole to diameter 3/8 inch. (see below left)

Put the rod back in the 3 jaw chuck. Using a parting off tool cut a slot in the rod leaving a flange of at least 1/32 on one end. Use the slowest speed for this and a sharp tool to avoid chatter and ensure a smooth finish. Make the slot at least 3/16 wide and around 1/16 deep
When the slot is made, but before parting off, make another slot at the same setting as the slot cut in the eccentric. (see above right). This will be used later to ensure the strap is to the same diameter as the eccentric. Part off most of the eccentric with the parting off tool and to avoid too much judder, finish the last bit in the vice by cutting the last bit with a hacksaw. Smooth up the saw cut end with a fine file. Drill a 1/16 hole around ¼ inch from the centre of the axle hole for the drive pin which will to meet up with 135 degree slot in the stop collar (see below). Time taken 1 hour.
Eccentric strap
I used a casting obtainable from the 2 ½ inch society for this but you can make your own up from bits of gunmetal. File/mill the casting to 3/16 thick to match the slot in the steel eccentric. Split down the middle and file the two joining face on a smooth file until the faces are at 90 degrees to the body.


Drill through one end to take an 8 BA bolt. Clamp the other part together with a small G clamp and drill through to the other end to take an 8 BA bolt. Repeat for the other side until the two blocks are nice and tight together. Mark the diameter of the eccentric with marking blue and cut out the middle with drills and files. Mount carefully in the 4 jaw chuck and turn to the diameter of the marking piece of steel left over from making the eccentric. Time taken 1 hour 45 minutes
Eccentric arm.
This is just a slab of 1/16 steel plate cut to shape and riveted to the eccentric strap with two iron rivets. Drill a 1/16 hole in the business end when you have found the correct distance from a mock up assembly. Time taken 30 minutes.
Stop collar
This is turned from 7/8 inch diameter brass rod with a hole drilled 3/8 in the centre. Before parting off mark a line through the dead centre with the end of a cutting tool. Part off at least 3/16 wide. Mark on a bit of paper a hole 3/8 in diameter with another line right through the dead centre and using a protractor mark the 135 degree line. This will help guide you as to how much to cut off to achieve the 135 degree angle. Cut off the driving slot with files until the 135 degree slot is reached. Tap a 6BA hole for the grub screw. Time taken 30 minutes.
Position the cylinder in the frames.
The cylinder is designed for use in Gauge 1 designs and would normally positioned with the valve face and steam chest facing upwards between the frames. For Gauge 3 the cylinder could still be mounted in this position, but would need packing bars to make up the difference in width between the frames. A better way to mount the cylinder is to rotate it rotated through 90 degrees such that the valve face and steam chest is facing the frames. This approach also keeps the cylinder well below the smoke box and permits more room for fitting the smoke box itself.
As each locomotive design is slightly different the position of the cylinder and length and position of the connecting rod will vary and you may decided to keep the cylinder in the same position as in Gauge 1. Additionally you must check the clearance of the rear cylinder cover and also the piston rod above the front axle. The best way to check these clearances is to place the cylinder block on the scale drawing of the locomotive in order to decide the best method, see a previous episode for a drawing.
In order to check the correct position of the cylinder in the frame and to facilitate the correct length of the connecting rod parts it is wise to do a dry run before committing yourself. A packing piece is needed first to move the cylinder away from the frame so that the centre line of the piston is aligned to the centre line of the Connecting rod. This was made from a piece of maple wood rescued from a kitchen unit, milled to ¼ inch thick and say ½ inch square. The cylinder with steam chest attached was placed in the frame with the packing maple wood ensuring that the piston is in line with the centre of the con rod.. (see picture below)
Take your time with this step as you must get it right. When satisfied that there is clearance in all directions (see above) mark the position of two holes on the frame to secure the cylinder. Drill through the frame and also the maple wood packing piece. Mark the cylinder block mounting face with marking blue and reassemble the cylinder in the frames in the correct position. Carefully spot through the hole in the frame onto the cylinder holding the cylinder in place with packing to make sure it does not shift. Remove the cylinder and drill and tap two holes to 6 BA. Open out the frame holes for clearance and do a trial assembly with the packing block and two 6 BA screws. Time taken was 1hour 45 minutes.
Mock up assembly prior to air testing
Before the air test can be made we need to work out the correct length of the connecting rod. First prepare the cylinder obtained from Ken Cousins. Make up bits of gasket sealant or oil smeared brown paper for the ends of the cylinder covers and the steam chest and cover. A new steam chest cover will be required made from a slab of 1/16 sheet brass drilled accordingly to match the steam chest. Drill out the 1/8 inch hole for the new exhaust hole using either the block up hole or drill a new one. Fit an O ring in Viton to the piston, screw up the cylinder covers and screw on the cross head. Make a valve knuckle from ¼ inch square steel bar tapped 10BA to match the valve rod and with a slot cut in the other end for the eccentric arm. Drill a 1/16 hole in the knuckle. The customary G1 steam inlet socket is mounted on top of the steam chest cover, however a new steam inlet socket is needed which is soldered onto the upper face of the steam chest. Make from ¼ inch brass with a ¼ by 32 thread.
Assemble the cylinder in the frames using the two 6BA mounting holes and the spacer block (in this case maple wood was used). Place the crank axle with unfinished connecting rod in position tightened up with the 8BA bolts and mounted in the frames with the correct pair of axle boxes. Pull the piston to its maximum extremity and slacken off by 1 mm. Rotate the crank axle and the connecting rod to its maximum backwards extremity. Trim the end of the male part of the connecting rod until the flats fit nice and tight inside the slot in the cross head. Remove the connecting rod and solder up the male part. Reassemble and spot through the hole in the cross head into the flats of the connecting rod and drill. When reassembled it should now be possible to rotate the crank axle such that the ends of the piston are 1mm away from the cylinder covers.
If there any doubts such that the piston strikes the covers, then the conn rod is too long. Unsolder the male part and make a new one taking greater care next time.
Now assemble the valve eccentric parts and repeat the above process to establish the correct length of the eccentric arm. This time remove one side of the frames with the steam chest cover removed so that you can establish the timing events of the valve by moving the stop collar in the forward direction and watching the valve events such that the valve is just opening when the piston is front dead centre. Lock up and see if the events are balanced forward and backwards. (see picture)
NEXT PART >
< PREVIOUS PART
<< Gauge3.info HOME

Air test
If you have got everything right the air test will be successful first time. Assemble everything and mount upside down for the air test - in this case using a paint spray compressor. James was not so easy as the stop collar slot at 135 degrees had to be opened out to nearly 165 degrees after much assembling, air testing, filing off a bit from the stop collar, reassemble and so on. After 2 hours of frustration it worked smoothly in both directions.
The match is to bung up the lubrication hole otherwise there is a pressure drop! The copper rivet holding the male end of the connecting rod is temporary as is the iron rivet holding the valve knuckle.
